We are the robots!
lauantai 7. marraskuuta 2015
Building a Lego EV3 robot is time consuming but rewarding
It's been a long time since I've played with Legos. Robots are something everyone is talking about nowadays. With my colleague it took approx 4 hours to build a Lego robot. In the end of the day there was a remote controlled robot standing on the table. In addition, test code was driven. I'm very pleased Lego EV3 robot is now there up and running. Next, we need to figure out how to program our robot. There is a coding environment available for Mac and Windows for free. So why not listen to Kraftwerk's The robots ;P.
The product of the year 2015 IMHO - Google's cardboard glasses
Three years in row I've been choosing hardware or software which have been useful for me during the year; Raspberry Pi (2012), Pebble Smart Watch (2013) and Android 5 (2014).
Year 2015 sort of "opened my eyes" when Google's cardboard glasses came available here in Finland. There are many 360 services available at the moment:
- It's possible to see Google's 360 channel on YouTube
- Music Television is going to broadcast live and 360 their annual gala later this autumn
- You can create 360 pics of your own with Google Camera app and send them to Google Street View
3D glasses have been around for a long time. This time is different. Now it's possible to create something own, not just enjoy 360 games and movies. What's best, you can look at your 360 pics with cardboard glasses immediately after shooting. That's why it's easy to announce Google cardboard glasses the product of the year 2015!
Cardboard glasses are inexpensive costing only ~ 6 €
perjantai 6. marraskuuta 2015
Neverware's version of Chromium OS runs smoothly on my Acer ZG5 mini laptop
If you have a spare laptop/PC you can easily turn it into a Chromebook. Neverware's version of Chromium OS called CloudReady has a super easy built-in installer. Installing CloudReady on hard disk is a task with no pain.
First you'll need a USB memory stick with CloudReady (i.e. Chromium OS) inside. Follow the steps I took in an earlier blog post. Boot your laptop from the memory stick.
Once you get CloudReady up and running log in with your Gmail account. Click in the down-right corner and choose to setup CloudReady on hard disk. You'll be asked if you are 100 % sure. Yes, you'll want to install CloudReady.
The installation will take ~ 20 minutes. After that your laptop will boot and you can start using CloudReady.
First you'll need a USB memory stick with CloudReady (i.e. Chromium OS) inside. Follow the steps I took in an earlier blog post. Boot your laptop from the memory stick.
Once you get CloudReady up and running log in with your Gmail account. Click in the down-right corner and choose to setup CloudReady on hard disk. You'll be asked if you are 100 % sure. Yes, you'll want to install CloudReady.
The installation will take ~ 20 minutes. After that your laptop will boot and you can start using CloudReady.
I guess multiboot is not possible?
tiistai 3. marraskuuta 2015
Turn your old Windows laptop into a Chromebook with Neverware's version of Chromium OS
If you own a spare laptop with Windows XP inside why not turn it into a Chromebook.
- First off, download Neverware's version of Chromium OS called CloudReady. It's free of charge for individuals.
- Unzip the file and write .bin to to your at least 8 GB USB memory stick. Use dd command in Linux
- # dd if=cloudready-free-44.1.34.bin of=/dev/sdb bs=4096
- Or Chrome Recovery Utility
- Boot your laptop from the stick. This way you'll get CloudReady up and running in live mode.
running on my Acer mini laptop
(CloudRaedy not there just yet!)
FullPageOS - a Raspberry Pi distribution to display a full page browser on boot
It's a distribution for Raspberry Pi aimed at info displays
In case you need a display which shows full web pages without any address fields then FullPageOS is for you. In addition, you can contact your display (and raspberry Pi) via ssh and change the contect remotely.
Ok, where can I get it?
The latest image based on Raspbian Linux can be found here: http://docstech.net/FullPageOS/ . Make sure the whole image is downloaded. I had to use wget since my browser didn't finish the job. If in doubt there is MD5 available to make sure the image is ok.
Image downloaded, then what?
Write the image on your SD-card. Use your favourite writer; for example Win32DiskImager in Windows, UNetbootin, etc. Make sure your card is big enough.
Boot your Pi and start configuring
To make wifi work edit the file fullpageos-network.txt which you can find in the directory /boot. In case you are using LAN-cable there is no need to edit fullpageos-network.txt.
Place the SD-card in your Pi and boot FullPageOS. Login via SSH using the following user and password; pi and raspberry. Now, configure FullPageOS like you do in Raspbian using sudo raspi-config.
Finally, edit the file /boot/fullpageos.txt which tells the OS which web address opens when Raspberry Pi and FullPageOS boot. Bear in mind FullPageOS let's user to browse any web page! Ok, there is no address field... which is not stopping anyone!
Tip: If you need to know your current IP boot process echoes IP on screen for a second. That's an easy way to find out whether you have an IP or not.
That's it!
Wait, does it work? Did you try it?
It does! I did! Look at the picture below!
Edit: Translation bar showed up. I chose "Never translate Finnish". Not showing anymore. I heard it's a bug. They are working on it!
In case you need a display which shows full web pages without any address fields then FullPageOS is for you. In addition, you can contact your display (and raspberry Pi) via ssh and change the contect remotely.
Ok, where can I get it?
The latest image based on Raspbian Linux can be found here: http://docstech.net/FullPageOS/ . Make sure the whole image is downloaded. I had to use wget since my browser didn't finish the job. If in doubt there is MD5 available to make sure the image is ok.
Image downloaded, then what?
Write the image on your SD-card. Use your favourite writer; for example Win32DiskImager in Windows, UNetbootin, etc. Make sure your card is big enough.
Boot your Pi and start configuring
To make wifi work edit the file fullpageos-network.txt which you can find in the directory /boot. In case you are using LAN-cable there is no need to edit fullpageos-network.txt.
Place the SD-card in your Pi and boot FullPageOS. Login via SSH using the following user and password; pi and raspberry. Now, configure FullPageOS like you do in Raspbian using sudo raspi-config.
Finally, edit the file /boot/fullpageos.txt which tells the OS which web address opens when Raspberry Pi and FullPageOS boot. Bear in mind FullPageOS let's user to browse any web page! Ok, there is no address field... which is not stopping anyone!
Tip: If you need to know your current IP boot process echoes IP on screen for a second. That's an easy way to find out whether you have an IP or not.
That's it!
Wait, does it work? Did you try it?
It does! I did! Look at the picture below!
Edit: Translation bar showed up. I chose "Never translate Finnish". Not showing anymore. I heard it's a bug. They are working on it!
FullPageOS up and running!
Connected via ssh
My Raspberry Pi B (1st gen)
perjantai 30. lokakuuta 2015
Android and Chrome OS are merging - a new Desktop OS will soon be here!
It's official! Android and Chrome OS, two operating systems made by Google, are merging.
What I have understood Chrome OS won't be there anymore but will be replaced with Android. Not 100 % sure though...
The new Desktop OS will be called Android and will be running on PC hardware. I guess Google wants to challenge Microsoft and it's operating systems Windows 7/8.1 and 10.
You have to wait until 2017. However, it's not that far away, is it!
Me and my Chromebook really look forward to see the new Android!
Edit: Android and Chrome OS might NOT merge? Not sure who to believe anymore.
What I have understood Chrome OS won't be there anymore but will be replaced with Android. Not 100 % sure though...
The new Desktop OS will be called Android and will be running on PC hardware. I guess Google wants to challenge Microsoft and it's operating systems Windows 7/8.1 and 10.
You have to wait until 2017. However, it's not that far away, is it!
Me and my Chromebook really look forward to see the new Android!
Edit: Android and Chrome OS might NOT merge? Not sure who to believe anymore.
Android 5 on Nexus 7 (2012) wifi
Chrome OS desktop
sunnuntai 11. lokakuuta 2015
How to make Lilypad blink an LED
Every time you start a new project with your Lilypad or Arduino make sure your hardware works. This is done by running "Hello world" -app.
Open your Arduino IDE (see picture below). If you don't have Arduino IDE, get it here: https://www.arduino.cc/en/Main/Software. In case you are running Linux you might need extra elevation of rights (i.e. sudo su in Ubuntu) . Attach USB cable and Lilypad to your PC. Under Tools in Arduino IDE, you can check if the right Arduino/Lilypad model and port are chosen. Many times it happens your hardware seems not work. This is due to wrong hardware and port.
In Arduino IDE click File, Examples, Basics, Blink. Right after that, Save Blink somewhere else. Now, change the code. For example, reduce the blinking time from 1000 ms to 100 ms (see picture below; delay (1000). Finally, click an arrow which points to the right. It saves, compiles and sends the code over to Lilypad or Arduino. Thumbs up! Fingers crossed! If you are lucky you have your very first Lilypad app up and running!
Open your Arduino IDE (see picture below). If you don't have Arduino IDE, get it here: https://www.arduino.cc/en/Main/Software. In case you are running Linux you might need extra elevation of rights (i.e. sudo su in Ubuntu) . Attach USB cable and Lilypad to your PC. Under Tools in Arduino IDE, you can check if the right Arduino/Lilypad model and port are chosen. Many times it happens your hardware seems not work. This is due to wrong hardware and port.
In Arduino IDE click File, Examples, Basics, Blink. Right after that, Save Blink somewhere else. Now, change the code. For example, reduce the blinking time from 1000 ms to 100 ms (see picture below; delay (1000). Finally, click an arrow which points to the right. It saves, compiles and sends the code over to Lilypad or Arduino. Thumbs up! Fingers crossed! If you are lucky you have your very first Lilypad app up and running!
Arduino IDE on Ubuntu Linux 14.04
Lilypad blinking internal LED
lauantai 10. lokakuuta 2015
An AOSP version of Android 6 is now running on my Nexus 4
An AOSP version of Android 6 runs on my Nexus 4
Google didn't publish Android 6 upgrade for Nexus 4 in the beginning of October 2015. My bad. However, only a week later the first AOSP-version* of Android 6 showed up! You can download all files needed here: http://forum.xda-developers.com/nexus-4/development/rom-6-0-android-marshmallow-pure-aosp-t3220900.
TWRP
Instructions say TWRP 2.8.7 (recovery tool) is needed. My version was older 2.8.6. There is TWRP Manager (root) in Play store. Thus it's easy to download and install the latest version of TWRP on your phone. See here: https://play.google.com/store/apps/details?id=com.jmz.soft.twrpmanager. I guess Nexus 4 needs to be rooted in order to make TWRP Manager work. You have to find out how to root Nexus 4 for yourself.
Android 6 and Google apps
I downloaded aosp_mako-ota-eng.franzd.zip (= Android 6) and gapps-mm-fix.zip (= Google apps). Using a file manager app it was easy see where inside my Nexus 4 those two zips were. TWRP manager was able to flash both zip-files (first Android 6 and after that Google apps). No help from PC was needed. No USB cables. Nexus 4 only.
First boot
It took some time before Android 6 showed up. First there was no carrier. After reboot I was able to make phone calls. So now I have Android 6 up and running! Look at the pic below.
*AOSP = Android Open Source Project (= Google leaded project for Android)
Google didn't publish Android 6 upgrade for Nexus 4 in the beginning of October 2015. My bad. However, only a week later the first AOSP-version* of Android 6 showed up! You can download all files needed here: http://forum.xda-developers.com/nexus-4/development/rom-6-0-android-marshmallow-pure-aosp-t3220900.
TWRP
Instructions say TWRP 2.8.7 (recovery tool) is needed. My version was older 2.8.6. There is TWRP Manager (root) in Play store. Thus it's easy to download and install the latest version of TWRP on your phone. See here: https://play.google.com/store/apps/details?id=com.jmz.soft.twrpmanager. I guess Nexus 4 needs to be rooted in order to make TWRP Manager work. You have to find out how to root Nexus 4 for yourself.
Android 6 and Google apps
I downloaded aosp_mako-ota-eng.franzd.zip (= Android 6) and gapps-mm-fix.zip (= Google apps). Using a file manager app it was easy see where inside my Nexus 4 those two zips were. TWRP manager was able to flash both zip-files (first Android 6 and after that Google apps). No help from PC was needed. No USB cables. Nexus 4 only.
First boot
It took some time before Android 6 showed up. First there was no carrier. After reboot I was able to make phone calls. So now I have Android 6 up and running! Look at the pic below.
*AOSP = Android Open Source Project (= Google leaded project for Android)
My Nexus 4 running
AOSP version of Android 6
keskiviikko 30. syyskuuta 2015
No Android 6 for Nexus 4? Now what?
Google told yesterday Android 6 is not coming to Nexus 4 . Don't worry. You can stick to Android 5.x or find an alternative ROM. It's not the end of the world.
In my case the above means I'm leaving Android and jumping to ROMs which are based on Android but have brand of their own. There are many ROMs to choose from: CyanogenMod, OmniRom, ParanoidAndroid, SlimRoms, AOKP to name some of them...
There are two you should keep in mind:
In my case the above means I'm leaving Android and jumping to ROMs which are based on Android but have brand of their own. There are many ROMs to choose from: CyanogenMod, OmniRom, ParanoidAndroid, SlimRoms, AOKP to name some of them...
There are two you should keep in mind:
- First off, are you sure you know how to flash your mobile phone? If not, find a spare phone and make your homework. See how to flash Nexus 7 (2012): http://wiki.cyanogenmod.org/w/Install_CM_for_grouper
- Secondly (and this not that bad), is your custom ROM able to update over the air (OTA)?
As there are more and more Android phones which will no longer receive updates custom ROMs are in very important role. I'm only hoping flashing an Android phone would become an easier task. At the moment, in my opinion, too much technological knowledge is required.
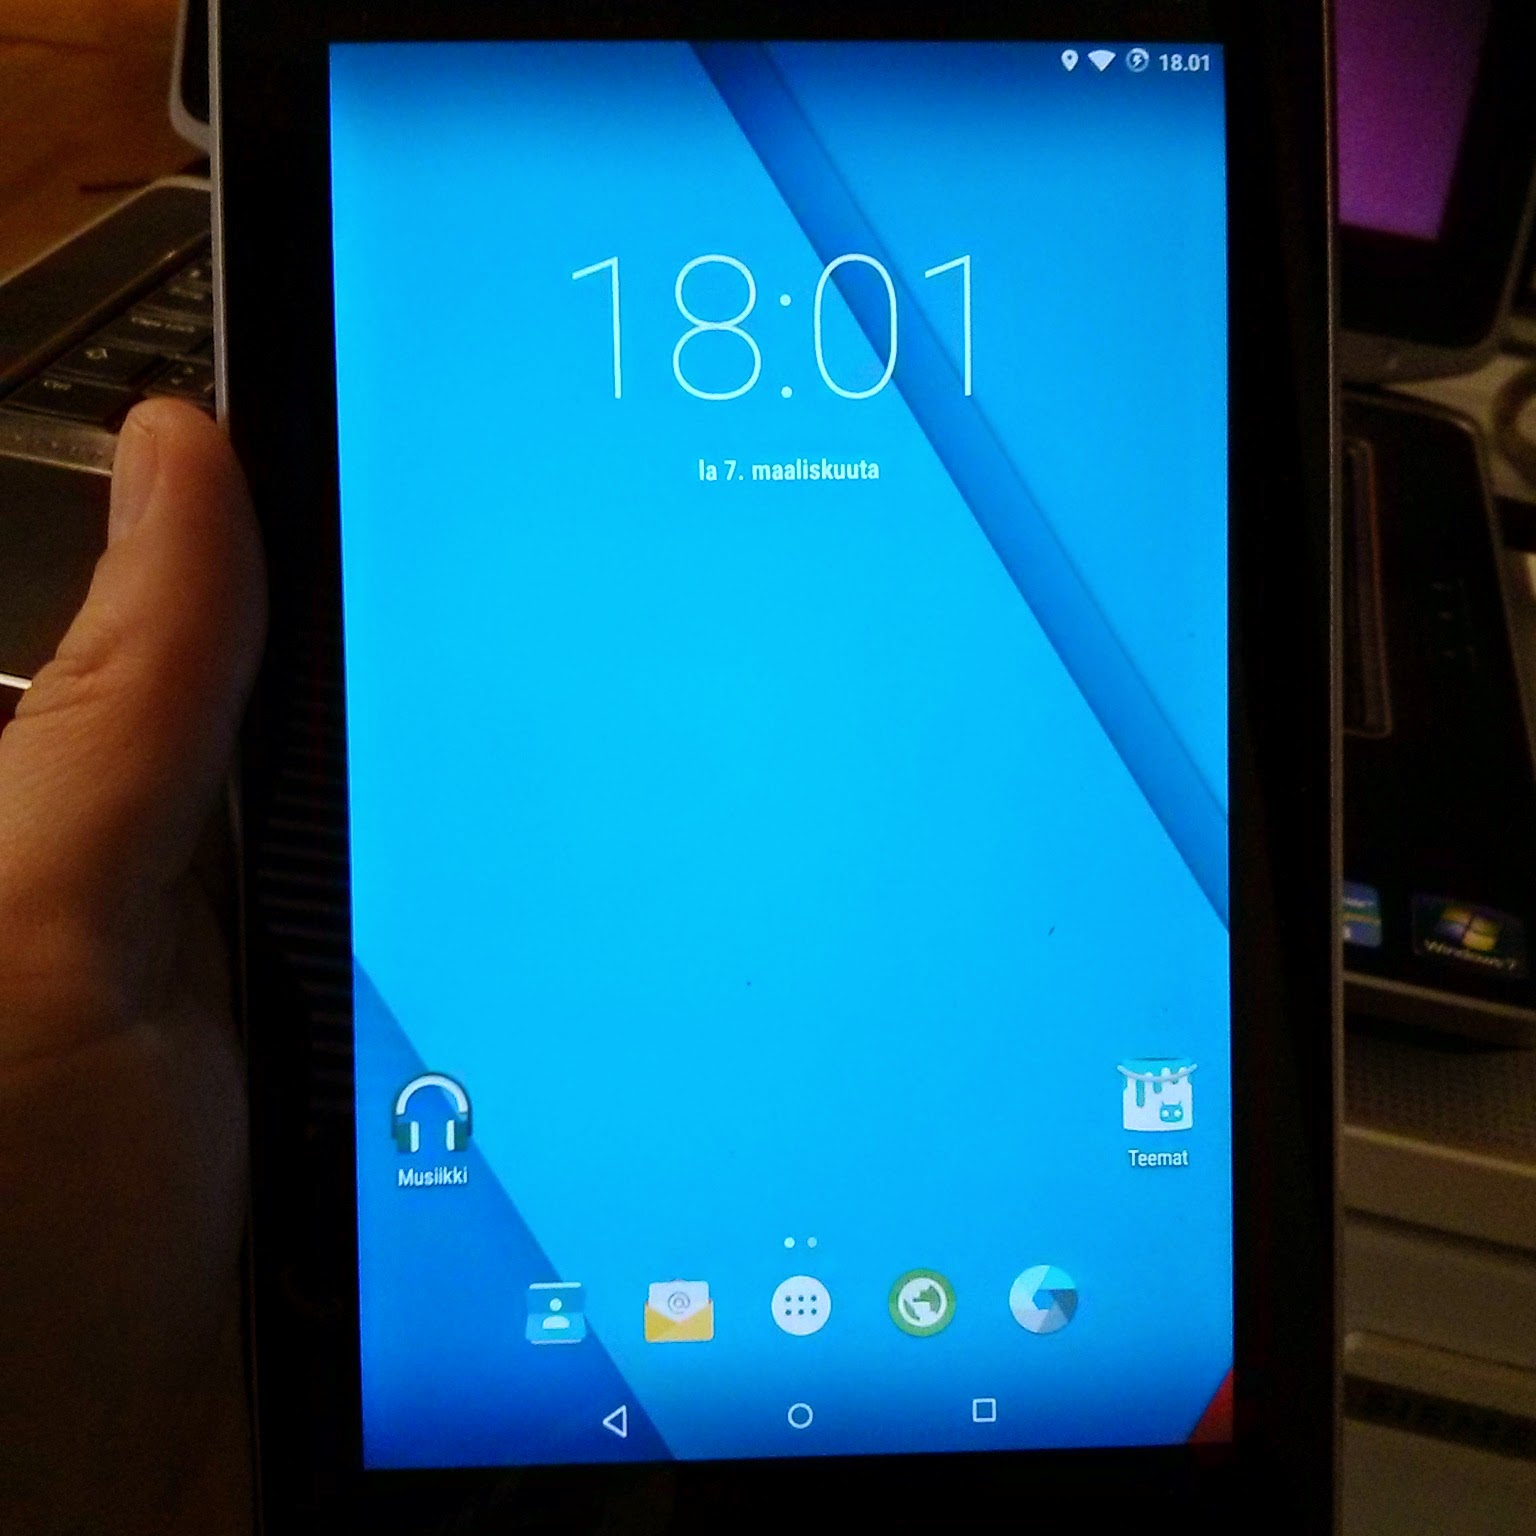
My Nexus 7 (2012) running CyanogenMod 12
Nexus 7 (2012) booting CyanogenMod
lauantai 26. syyskuuta 2015
Sitecom WL-113 wifi dongle from year 2004 still going strong
Local flea market always has something interesting to offer. This time I picked up an old wifi dongle from Sitecom.
The crucial thing is which chip dongle is using. Sitecom has Zydas's chip inside. Good! For example Debian and Ubuntu support is there. See this: https://wiki.debian.org/zd1211rw. How do you find out if dongle is recognized on Linux? Open your favourite terminal app on Linux and type "dmesg" (without quotation marks).
Next I need to test Sitecom wifi dongle on Raspberry Pi 1 and 2. I'm pretty sure Raspi 2 is able to handle Sitecom dongle. Raspi 1 is a question mark. Will there be enough power for the dongle in Raspi itself or do I need to attach a USB 2 hub with external power?
The crucial thing is which chip dongle is using. Sitecom has Zydas's chip inside. Good! For example Debian and Ubuntu support is there. See this: https://wiki.debian.org/zd1211rw. How do you find out if dongle is recognized on Linux? Open your favourite terminal app on Linux and type "dmesg" (without quotation marks).
Next I need to test Sitecom wifi dongle on Raspberry Pi 1 and 2. I'm pretty sure Raspi 2 is able to handle Sitecom dongle. Raspi 1 is a question mark. Will there be enough power for the dongle in Raspi itself or do I need to attach a USB 2 hub with external power?
perjantai 25. syyskuuta 2015
Poor man's Desktop on Android - mouse and keyboard support via OTG-cable
Poor man's Desktop: Samsung Galaxy S4, an OTG-cable (On The Go), a passive USB-hub, a mouse and a keyboard.
Make sure all devices consume as little power as possible. Keep in mind not all Android devices accept peripherals. Edit: maybe an active hub with own external power is not a bad idea...
From now on it's possible for me to write text and use for example Microsoft Office almost the same way as on a normal Windows/Linux Desktop. Well, almost...
Make sure all devices consume as little power as possible. Keep in mind not all Android devices accept peripherals. Edit: maybe an active hub with own external power is not a bad idea...
From now on it's possible for me to write text and use for example Microsoft Office almost the same way as on a normal Windows/Linux Desktop. Well, almost...
Samsung Galaxy S4 with mouse and keyboard support
Make sure all devices consume as little power as possible
Ubuntu 15.10 beta 2 available - 16.04 will bring us Mir
Ubuntu updates in every April and October. You can download beta 2 of Ubuntu 15.10 here: http://releases.ubuntu.com/15.10/ .
Next spring will be very exiting as we'll see a very different Ubuntu 16.04. Canonical ltd is going to offer Ubuntu with Mir, a next generation display server. Until then I will stick to 14.04 LTS.
Firefox browser in mobile mode
(Control+Shift+M) on Ubuntu 14.04 LTS
torstai 17. syyskuuta 2015
Google Hangout Air - how to setup a public live session
I had already forgotten. That's why this blog post exists ;D. So let's see how to setup a public live video session which can later be seen via YouTube.
First off, go and get Gmail account. Secondly, make a Google search with the following words: google plus. Once you find Google Plus login using your Gmail account.
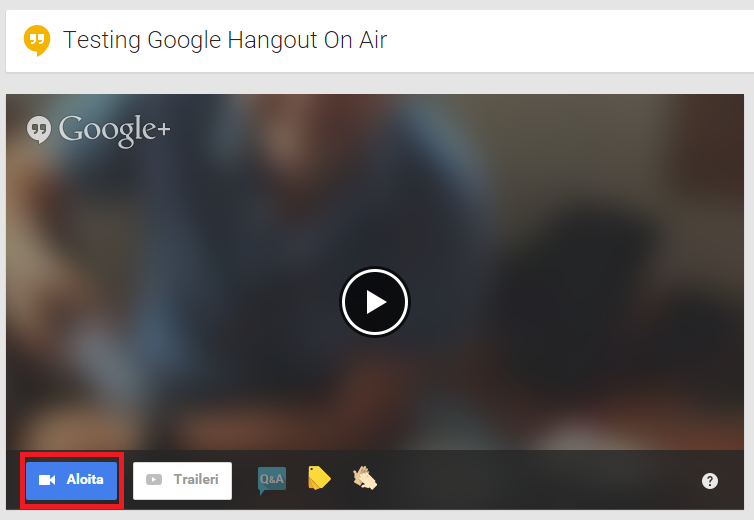
Inside Google Plus look for a "little cabin" icon up left. See picture below (in Finnish only, sorry).
First off, go and get Gmail account. Secondly, make a Google search with the following words: google plus. Once you find Google Plus login using your Gmail account.
Inside Google Plus look for a "little cabin" icon up left. See picture below (in Finnish only, sorry).
Choose Hangouts.
Choose Hangouts On Air and Create Hangout On Air.
Name your session and choose Share.
Choose Start.
You can invite friends by typing in their email addresses. However, this time the whole world is your friend so there no need to do that and you can pass by this option.
Wait until all gets set!
You can start broadcasting live now!
In case you are absolutely sure, choose OK. You have 8 hours live time to spend!
You can find the address of your Live session by clicking the the Link-symbol in the down-right corner.
When you are done, choose red button to close your live session.
Afterwards, look for your live session on YouTube. It takes a while before your video shows up. How did I find my sessions? I have a YouTube channel. All my clips are stored there.
keskiviikko 9. syyskuuta 2015
Join Apple event with Windows 10's new Edge browser
Apple September event is held today. Not only iOS or OS X users may join but Windows 10 users as well. All you need to is open the following link with Microsoft's new Edge browser (on Wednesday at 10 AM PDT 2015/09/09): http://www.apple.com/apple-events/september-2015/ .
Windows 10 on Acer W510
tiistai 25. elokuuta 2015
Paying with Bitcoin in K-market Mansku (Helsinki, Finland)
Hey Lidl, beat this!
In Helsinki, Finland there are not too many stores which accept Bitcoin. However, according to bitcoin map service from Bittiraha.fi three groceries (K-market Mansku, K-market Pietari and K-market Jätkäsaari) all handle Bitcoin. This was something I wanted to try!
Getting ready
Off I went and reactivated my bitcoin wallet which has been lying on the Internet for ages with no use at all. Ok, password was not forgotten. What a good start!
In Helsinki, Finland there are not too many stores which accept Bitcoin. However, according to bitcoin map service from Bittiraha.fi three groceries (K-market Mansku, K-market Pietari and K-market Jätkäsaari) all handle Bitcoin. This was something I wanted to try!
Getting ready
Off I went and reactivated my bitcoin wallet which has been lying on the Internet for ages with no use at all. Ok, password was not forgotten. What a good start!
My bitcoin wallet
After re-opening my wallet I realized there was hardly any money left. There are many places in Helsinki where you can exchange euros to bitcoins. One of them is in Levykauppa äx. It's a record store in Asematunneli near railway station and subway. I've been there once and exchanged 5 euros to bitcoins. There are instructions available and the stuff of the store helps if needed. Just make sure you have some euros and bitcoin wallet with you and you remember the password of your wallet.
Levykauppa äx (Record store X), Asematunneli, Helsinki
Exchanging euros to bitcoins
in Levykauppa äx
Paying in K-market Mansku with bitcoin
I was ready to enter the grocery K-market Mansku. Since I wanted to give the cashier and myself some time to figure out how to pay with Bitcoin I chose the early morning hours with less people in the store.
K-market Mansku is not that far away from my home
Paying with Bitcoin was easy. Cashier had a tablet with a QR-code. All I needed to do was to scan the code using my wallet and tap Send. Watch the video below. It explains (in Finnish) what happened during the transaction.
Paying with Bitcoin really is easy!
sunnuntai 16. elokuuta 2015
Pano2VR - converting a panorama pic into Google Cardboard VR
EDIT 2015/09/06): YOU ONLY NEED TO TAKE PANORAMA OR SPHERE PICS WITH GOOGLE CAMERA APP! NO NEED TO CONVERT WITH PANO2VR ANYMORE!
- If you happen to own an Android based mobile phone then download Google Camera app. It's available in Google Play store and it's free. In Nexus-phone Google Camera might already be there.
- Find a place where it's possible to turn around 360 degrees and you want shoot your panorama pic. I chose the option "Panorama" but I guess "Photo Sphere" is also possible (which I haven't tested it yet!).
- Taking panorama pics is easy when you know how to do it ;D.
- Move your phone slowly from one "ball" to another. Those "balls" appear on the screen of your mobile phone.
- When done a panorama pic is generated and saved.
- Copy your newly made panorama pic from your phone to your computer. My pic was ~ 5 MB.
- Download and install an app called PANO2VR. It's available for Windows, Mac OS X and Linux. In addition it's free for testing. I chose the latest beta version.
- Tap Input and find your panorama pic. Then choose Convert Input.
- Choose TIFF as output (=Format) and "Convert".
- The resulted files are big. My TIFF was ~ 450 MB.
- Install Cardboard app from Google Play store to your mobile phone.
- Copy TIFF to your Android phone.
- Find a folder called "Cardboard".
- That's the place for the TIFFs,
- Make sure you don't run out of free space in your phone! Delete TIFFs you don't need anymore!
- In Cardboard app choose "Cardboard Demos" and then "Photosphere". Your TIFF should show up.
- Place your phone inside the cardboard glasses and enjoy.
Choose TIFF and Convert.
Choose Cardboard Demos.
Choose Photo Sphere.
Enjoy!
lauantai 8. elokuuta 2015
Delete Windows 10 setup files - save disk space
In case you upgraded from Windows 7/8.1 to Windows 10 then there are extra files on your hard disk only wasting your hard disk space. Look for Disk Cleanup utility to delete files unneeded.
If you are sure you are NOT going back and are NEVER going to downgrade to Windows 7/8.1 then it's possible to save even more. Windows 7/8.1 recovery files are there on hard disk waiting to be deleted. Before doing anything, have some coffee and think about it. There is no coming back! Remember you delete your files at your own risk!
My Acer W4-820 only has 32 GB eMMC memory (i.e. my hard disk is 32 GB). I was able to free 7 GB of memory for other apps or files. Acer hard disk use came down from approx 25 GB to 18 GB. That's not too bad. On the other hand I can't downgrade to Windows 8.1 anymore. However, that doesn't matter. I'm pleased with Windows 10 on Acer W4-820.
If you are sure you are NOT going back and are NEVER going to downgrade to Windows 7/8.1 then it's possible to save even more. Windows 7/8.1 recovery files are there on hard disk waiting to be deleted. Before doing anything, have some coffee and think about it. There is no coming back! Remember you delete your files at your own risk!
My Acer W4-820 only has 32 GB eMMC memory (i.e. my hard disk is 32 GB). I was able to free 7 GB of memory for other apps or files. Acer hard disk use came down from approx 25 GB to 18 GB. That's not too bad. On the other hand I can't downgrade to Windows 8.1 anymore. However, that doesn't matter. I'm pleased with Windows 10 on Acer W4-820.
perjantai 7. elokuuta 2015
Disable Windows 10 tracking - download a handy tool
Windows 10 has a feature called "Telemetry" which collects all sorts of user activity and sends it to Microsoft. And it's on by default! In addition there is a bunch of other tools which do similar tasks inside your shiny new operating system.
What can you do? A handy tool has been developed to disable all the tracking! All you need to do is download an .EXE and run it (as administrator!). You can either disable or even delete services which do tracking. Look at an animated GIF below.
Warning! You run EXE-file at your own risk!
Links:
What can you do? A handy tool has been developed to disable all the tracking! All you need to do is download an .EXE and run it (as administrator!). You can either disable or even delete services which do tracking. Look at an animated GIF below.
Warning! You run EXE-file at your own risk!
Links:
- https://github.com/10se1ucgo/DisableWinTracking
- https://www.reddit.com/r/Windows10/comments/3fn46j/i_made_my_own_userfriendly_windows_10_privacy/
- http://muropaketti.com/reddit-kayttajalta-yksinkertainen-tyokalu-windows-10n-seurantatoimintojen-poistoon (in Finnish)
maanantai 3. elokuuta 2015
Windows 10 updates via Microsoft P2P as default - disable it!
Windows 10 has arrived! You can write boot stick of your own or force your PC to begin to install Windows 10. After setup Microsoft offers mobile versions of Word, Excel and PowerPoint - for free! But are there free lunches?
Did you know your Internet access is used by Microsoft. Your Windows 10 -based PC acts as a peer and sends update packages to other Windows 10 users in the neighbourhood. Windows 10 PCs create sort of global P2P network.
Only two months ago I upgraded my Internet connection at home from 10 Mbit/s to 100 Mbit/s. We are three people living under the same roof and we needed some extra speed because of all the video streams (for example YouTube).
My concern is P2P feature inside Windows 10. I don't want to hear that moaning from my daughter saying the Internet is stuck! So let's turn P2P off! It goes like this:
Did you know your Internet access is used by Microsoft. Your Windows 10 -based PC acts as a peer and sends update packages to other Windows 10 users in the neighbourhood. Windows 10 PCs create sort of global P2P network.
Only two months ago I upgraded my Internet connection at home from 10 Mbit/s to 100 Mbit/s. We are three people living under the same roof and we needed some extra speed because of all the video streams (for example YouTube).
My concern is P2P feature inside Windows 10. I don't want to hear that moaning from my daughter saying the Internet is stuck! So let's turn P2P off! It goes like this:
- Find Windows Update in your Windows 10.
- You should now see Advanced options.
- Then click Choose how updates are delivered.
- Disable Updated from more than one place.
lauantai 1. elokuuta 2015
Touch enabled mobile versions of Word, Excel and PowerPoint available for Windows 10 in Store for free
In case you upgraded to Windows10 and happen to own a tablet or laptop with touch screen you can download Word, Excel and PowerPoint mobile versions in Store for free. All you need is Microsoft Account to make apps save files to Microsoft OneDrive.
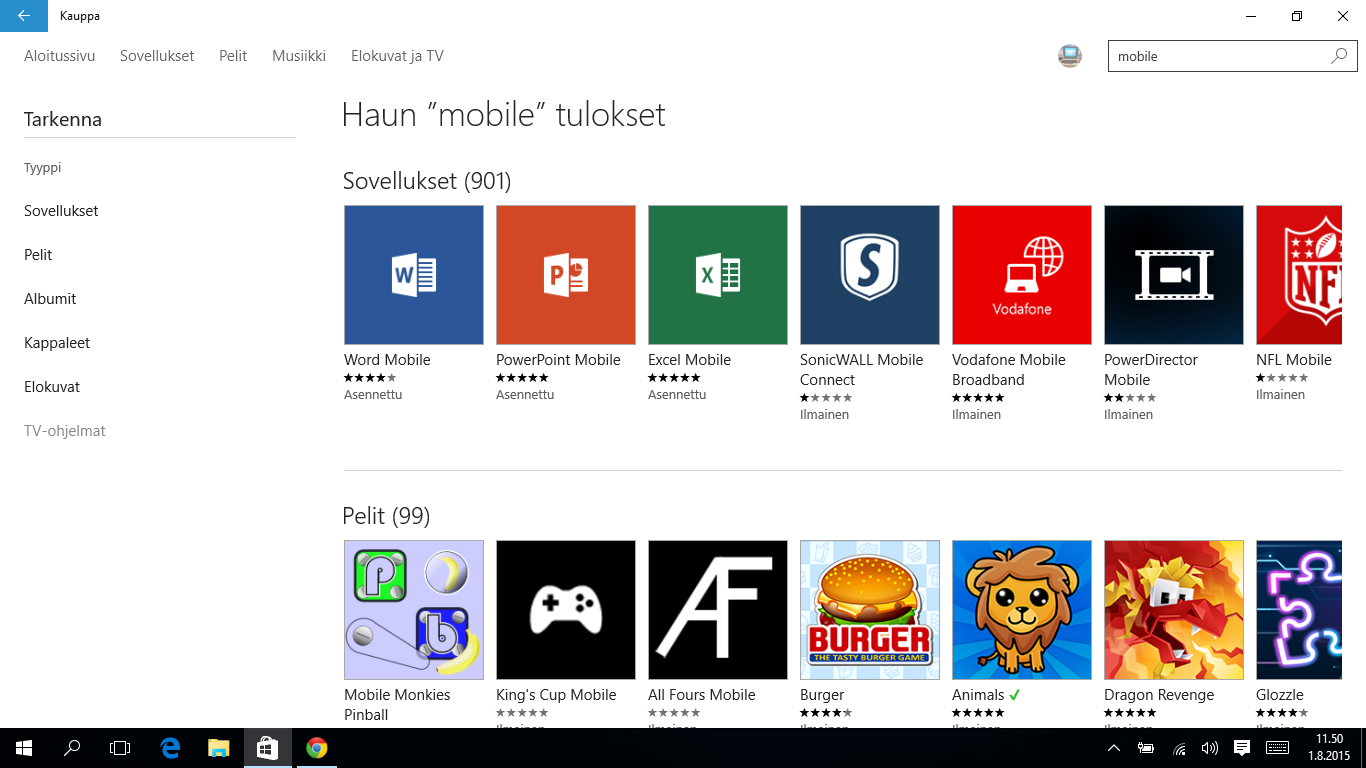
So browse your new and shiny Windows 10 and enter Store-app. Type search word "mobile" (without citations) and install three essential and free of charge apps on your Windows 10.
Use search word "mobile"
Word Mobile
Tilaa:
Blogitekstit (Atom)